Setup L2TP VPN client on Windows 10
- From the Windows 10 Start Menu, click Settings.

- Click Network & Internet

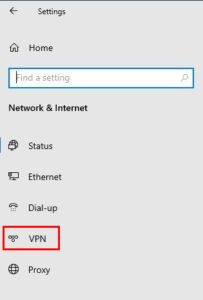
- On the left navigation menu, select VPN.
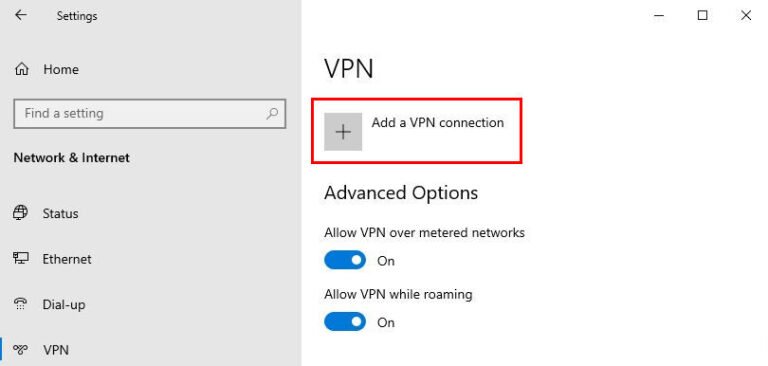
- Click Add a VPN connection.
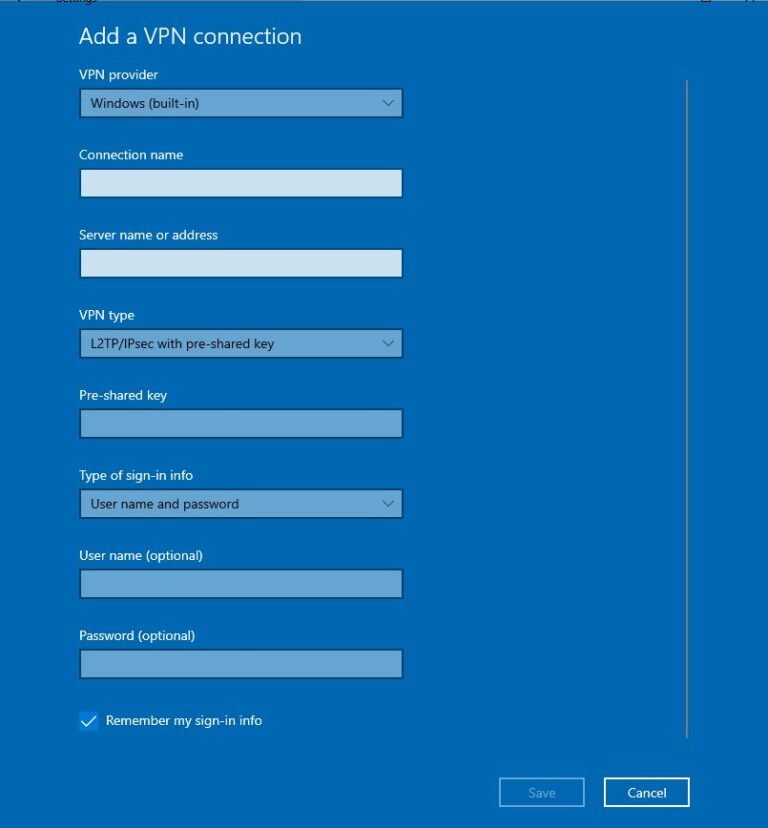
- In the VPN provider text box, select Windows (built-in).
- In the Connection name text box, type a name for the Mobile VPN (such as “L2TP VPN”)
- In the Server name or address text box, type the DNS name or IP address for the Firebox external interface.
- From the VPN Type drop-down list, select Layer 2 Tunneling Protocol with IPSec (L2TP/IPSec).
- Click Save.
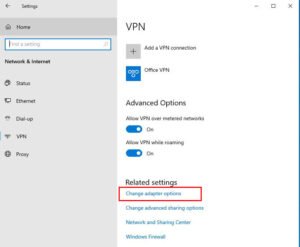
- On the VPN settings page, click Change adapter options.
- Right click your VPN and select ‘Properties’.
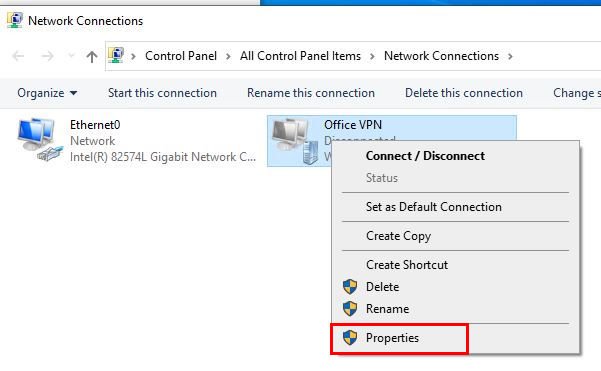
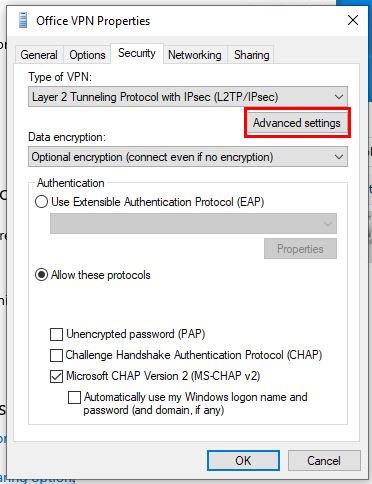
- Click the Security tab.
- From the Data encryption drop-down list, select Optional encryption (connect even if no encryption).
- Select Allow these protocols.
- Select Microsoft CHAP Version 2 as the only allowed protocol.
- Click Advanced settings to assign Pre-shared Key
18. Type in the provided preshared key from your administrator.
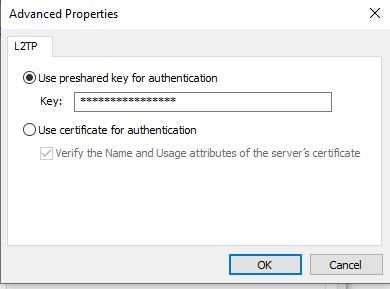
- Click OK.
- Do not change the default settings on the Networking tab.
- Click OK.
Should you have any questions or need help with this issue, please contact us . We can be reached at 402-261-1777 or help@sw7t.com
