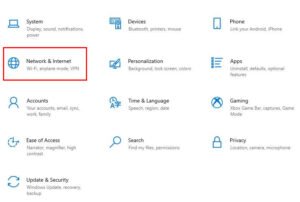
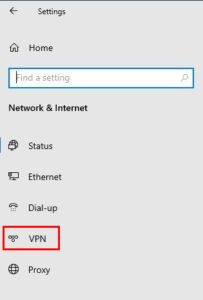
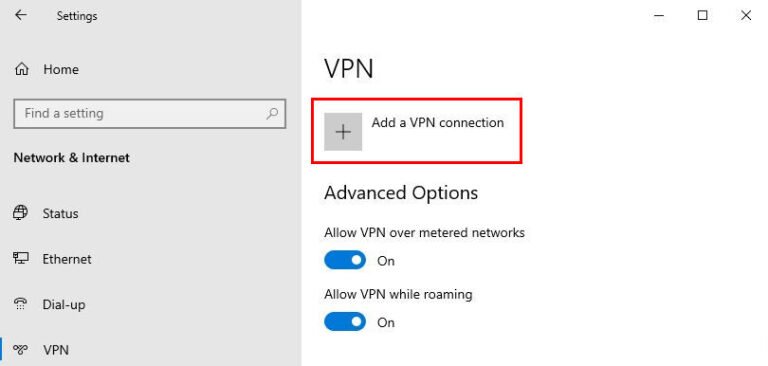
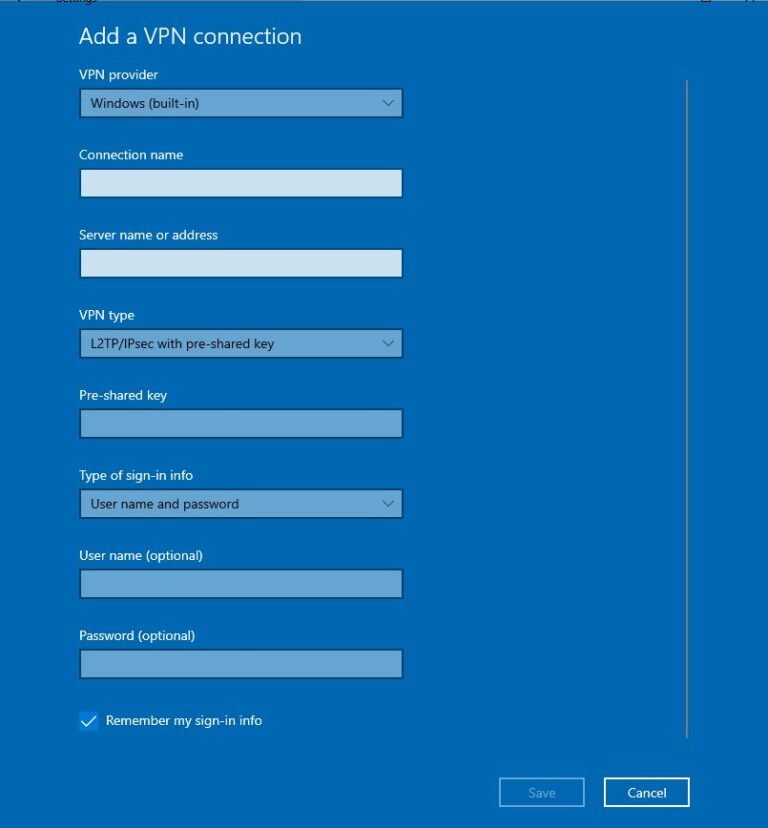
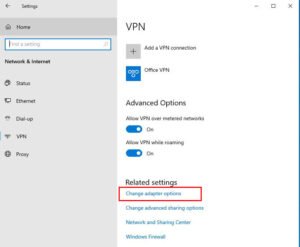
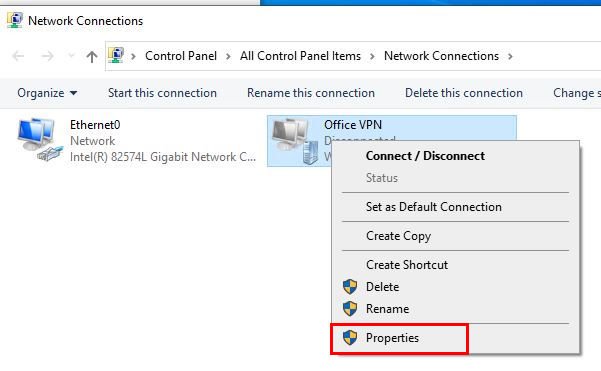
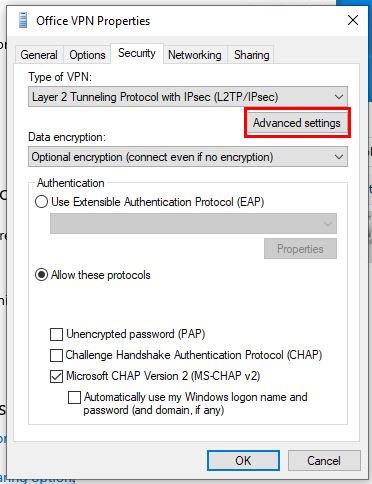
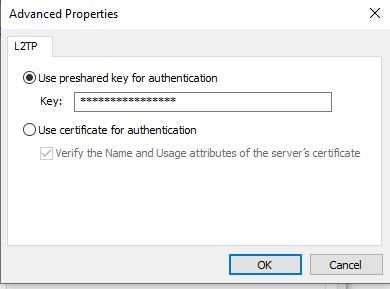
How to set up L2TP/IPsec VPN on Windows 10 Leave a Comment / VPN / By itsupport@switch7tech.com Setup L2TP VPN client on Windows 10 From the Windows 10 Start Menu, click Settings. Click Network & Internet On the left navigation menu, select VPN. Click Add a VPN connection. In the VPN provider text box, select Windows (built-in).In the Connection name text box, type a name for the Mobile VPN (such as “L2TP VPN”)In the Server name or address text box, type the DNS name or IP address for the Firebox external interface.From the VPN Type drop-down list, select Layer 2 Tunneling Protocol with IPSec (L2TP/IPSec).Click Save. On the VPN settings page, click Change adapter options. Right click your VPN and select ‘Properties’. Click the Security tab.From the Data encryption drop-down list, select Optional encryption (connect even if no encryption).Select Allow these protocols.Select Microsoft CHAP Version 2 as the only allowed protocol.Click Advanced settings to assign Pre-shared Key 18. Type in the provided preshared key from your administrator. Click OK.Do not change the default settings on the Networking tab.Click OK. Should you have any questions or need help with this issue, please contact us . We can be reached at 402-261-1777 or help@sw7t.com